I’ve been a photographer for several years now. Over that time, I’ve made a lot of mistakes and missteps. I made many mistakes as a beginner photographer. Since they say that good decisions come from wisdom and experience and also wisdom and experience come from bad decisions, perhaps I should share some of my experience. I’ve already started sharing some in part 1. So, here are 5 more tips which I really wish I would have known as a beginner photographer.
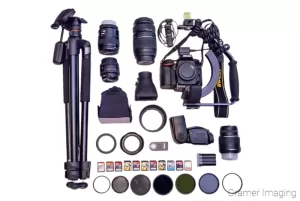
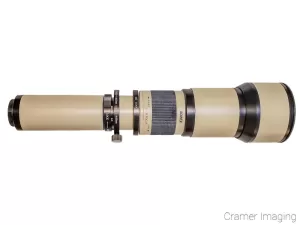
This is, perhaps, the best beginner photography tip I can offer. I really didn’t think about this at all as a beginner photographer. In my opinion, it should be high up on any list of tips offered to a beginner photographer. You must factor weight into any and all photography ventures lasting longer than a few minutes. Let me break it down into a chart so you’ll get a good idea.
| Camera Equipment | Weight (lb oz/g) |
|---|---|
| Nikon D7200 Body Includes battery and memory card |
1 lb 11.0 oz or 765 g |
| Nikkor 18-55mm lens | 6.9 oz or 195 g |
| Tamron 70-300mm lens | 19.2 oz or 545 g |
| Nikkor 50mm lens | 6.6 oz or 185 g |
| Custom Brackets Flash Bracket | 17 oz or 482 g |
| Hoodman Hoodloupe | 0.45 lb or 204 g |
| Total Weight | 4 lb 13.15 oz or 2376 g |
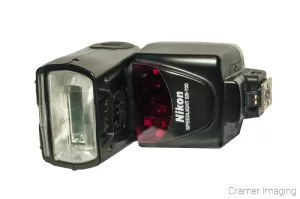
As you can see, I’ve added almost 5 LB extra to my body just in the listed camera gear. However, I’m not including the weight of the bag or any other smaller equipment (such as filters, extra batteries, or extra memory cards) which enable me to take better pictures in the field. If I included those in the final total, I’d easily be carrying an extra 6 to 7 LB or more total. Please also consider I used to carry more in my bag. I’ve removed several items I rarely used (such as a flash unit weighing 12.7 oz or 360 g) to lighten my camera bag.
Now imagine carrying all this weight on a several hour hike to a remote landscape location. How about hauling this around for several hours on your feet at a wedding? Also remember I’m not counting anything outside of camera gear. Now imagine adding a couple full water bottles and some other food supplies as well. The overall weight really starts to add up. While it’s easily borne over a short duration, it’ll easily erode your endurance over time. So if you plan on pursuing anything in photography seriously, then you must account for weight in your plans.
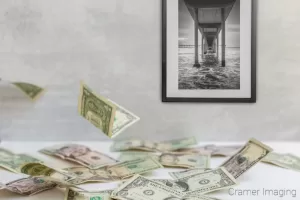
Of all the beginner photographer tips I could offer, this one is a serious time suck and financial pitfall. Watch out for gear lust. It will trip you up early on as you study photography. I delve much deeper into gear lust in this article so I’ll only briefly summarize it for you. Gear lust is a strong desire to acquire shiny new equipment (camera or otherwise) for no particular reason other than you want it. You may not need it. You probably won’t know how to use it in your photography. Still, you feel you must have it to be a “proper photographer” or something like that.
Researching camera gear may prove useful to you in the beginning. You need to find something which will meet your needs as a photographer. However, pouring hours of time into creating your “dream setup” assuming money was no object is not productive. Most people don’t have that kind of money laying around. Even if you come into that money later, you cannot guarantee that your list will still be accurate. Camera technology advances quickly. Oftentimes, what was top of the market is replaced over 5 years or so with a newer model. Also, many accessory businesses go out-of-business. You cannot guarantee that backdrop you love will be available in a few years.
Instead, invest your time into actually taking photos with the gear you do have. Then you’ll learn your preferences and where your current equipment leaves gaps. Then you fill those gaps with extra equipment as you can afford it. That’s how I’ve proceeded and I don’t regret it.
So I know I may break some hearts with this one. Of all the beginner photographer tips I offer, this one may be most important. You are not ready to go pro. Period. Do not pass Go. Do not collect $200.
I made this very mistake myself. I decided to go pro long before I was ready. So, yeah. I paid for it. If you’d like an idea of what I’m talking about, here you go. These photos below are some of my very early work. I received pay for them.


While a couple of these photos are undoubtedly cute, please consider how much the parents paid for the photos. I received $25 each for a couple and $100 for one. Given that quality and the attached prices, I wouldn’t complain about the deal if I were the parent. Now, consider how you’d feel if I charged $200-$500 for a portrait session and gave you something like those above? I bet you’d be unhappy and rightfully so. These photos demonstrate I wasn’t ready to go pro when I did.
Now compare those photos above with these below. I’ve also received pay for these photos. Random strangers who don’t know me bought prints. I’ve quickly sold out of every copy of the second photo which I ordered. I just about can’t keep it in stock.

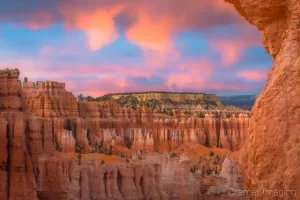
So, perhaps you notice a significant quality difference between both sets of photos. I took the first set after studying photography for about a year or 2. I took the second pair after more than 10 years of studying photography. So, I clearly wasn’t ready to go pro when I did. You’re in the same boat. Instead of going pro immediately, take some time and study/practice before you attempt to go pro. Solidify your skills in camera and in post-processing. Dial up your consistency. Trust me. It’s worth the wait.

I started my photography education in college with formal classes. However, I’ve continued my education independently and for free. So, why am I telling you this? Because you can learn photography for free too.
I wondered why so many photographers were literally sharing beginner photographer tips online for free. It made no sense. However, I was wrong. It makes perfect sense. Photography isn’t a memorize-and-regurgitate field. You can’t simply become and expert by reading a couple online articles. So giving away the knowledge for free isn’t a threat. But you’re not an expert yet. So, capitalize on these free resources. Learn basic operations and various techniques in the comfort of your own home and on your time.
A simple internet search will yield lots of results for beginner photographer tips and tutorials. However, if you need a great place to start, you might check out this website. I used Digital Photography School extensively some years ago. From them I learned much about photography in general and even my particular niche: landscape photography. I even know quite a bit about other photography genres which I’ve utilized when I need to. By the way, I receive nothing for telling you about them.
 In many ways, there seem to be 2 different kinds of people in the world. In this case, I’m referring to people who like to know things and people who like to do things. If you’re new to photography, then you must learn a lot. I’m not just talking about book knowledge either. There’s surprisingly little book knowledge in photography outside of photography history. You must learn muscle memory with your camera and other equipment.
Photography isn’t about memorizing a bunch of facts. It’s not about pointing to all the buttons and reciting back what they’re supposed to do. Photography is about results. It’s about the final picture you take. Most of my photography class grades were based on the photos I took, not my answers to test questions. Those classmates who utilized their cameras well and in innovative ways received higher grades than those who didn’t.
However, this isn’t all. Once I started working out in the field more, I learned the importance of muscle memory with my camera. I spent many a photo shoot trying to remember how to operate a basic function. This slowed down my photography. I wasn’t very creative. My photos reflected that. Sadly, I also demonstrated this amateurism (in more than 1 way) in front of actual paying clients. GASP! I’m sure that also contributed to my very slow early photography career.
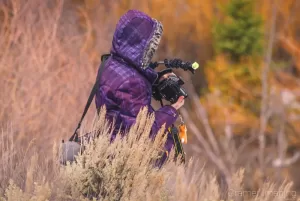
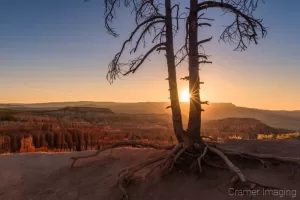
Now, let’s try an example of muscle memory in the field. Observe this photo below.
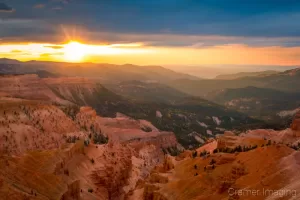
So, I had a slim window of time to capture this shot. If I recall correctly, it was literally (no joke) about a couple minutes. Because I knew exactly what I was doing with my camera, I managed to capture the shot. So, when I paused to add extra gear (taking about 3 to 5 minutes total) the sun moved and the light changed. I no longer had this scene in front of me. Now, imagine if I took 3 to 5 minutes setting up my camera and fiddling with controls I don’t understand yet. I would have missed the shot entirely. Sometimes a narrow window is all I get. So, I must know my camera via muscle memory. Otherwise, I might miss a shot like this.
So, in conclusion, these are a few more pitfalls I hope you’ll avoid in your photography journey. We can learn from our own mistakes. However, it’s in learning from others’ mistakes where we learn much quicker if we’re willing to do so. I hope you’re willing to learn from some of my mistakes. I’ll keep sharing beginner photographer tips for those who are willing. Stay tuned for the next episode.

Receive monthly updates in your inbox from us.

Powered by atecplugins.com