As a landscape photographer, I spend quite a bit of time talking about things I do in my photography. However, there is another side. There’s the side of what not to do in landscape photography. As budding new landscape photographers need this information too, I thought I’d start sharing 10 things you should not do in landscape photography. I’ve already written part 1 (linked above). This is part 2.
1. Poor Lighting Conditions
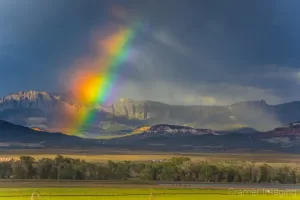
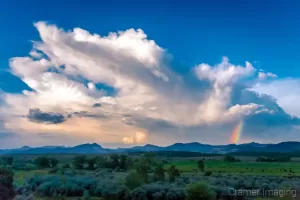
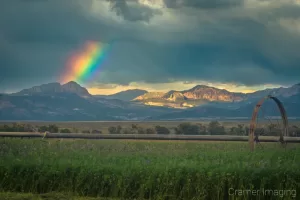
In landscape photography, lighting is everything and the sun is about your only good source of light. This means that you rely upon current conditions for your photos. While we learn to chase good lighting conditions with golden hour and blue hour, we often find ourselves facing poor lighting conditions in some fashion. Check out these examples of poor lighting.
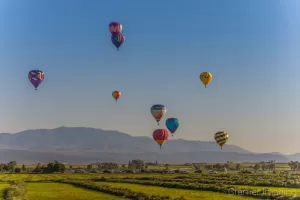
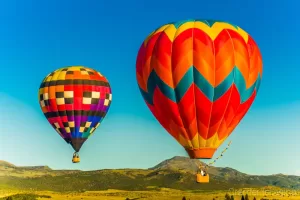
Now, hot air balloons fly when hot air balloons fly. They depend upon a different set of conditions for operator, passenger, and equipment safety. Even if the light is great, flying conditions might not be and vice versa.
Back on topic, poor lighting condition create problems with the overall final image. They may offer blown out highlights and extra deep shadows in the case of harsh direct sunlight. We lose details in both extremes. Dappled light will oscillate between the soft and even light found in the shade and the issues of harsh direct sunlight creating a very uneven exposure. There are other kinds of bad light but those are the most prominent.
The Solution
There are several different approaches you can make towards fixing or mitigating poor lighting conditions. I’ll break them down here.
Direct Sunlight
Sometimes you cannot avoid the harsh direct sunlight. When that happens, try positioning it to the side in order to take advantage of textures and shadows created by sunlight on the side.
It may not always work, but it’s worth a try.
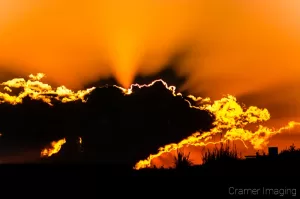
Backlit Scene
If you find that the scene in front of you is backlit by the sun, then you have another option. Try to take advantage of that back-lighting and go for dramatic silhouettes in your landscape photography.
Front Lit Scene
Sometimes you’ll find yourself standing with your back to the sun in landscape photo setup. That’s about the worst possible position you can be in. The direct light will make the scene appear flat in front of you. Your best bet is to try changing the direction you’re facing. Try putting it to the side and using the advice above.
White Sky
Cloudy skies can provide some of the better light available. However, they’re less than ideal at times. Sometimes you’ll end up with a white wash above. That won’t work for landscape scenes featuring the sky. You can either minimize the sky in the scene, cut it out entirely, or use the opportunity to focus on close-up photos. Alternatively, you could use the white sky as negative space. This works well for monochromatic photos. Whatever you choose, this soft lighting is too good to pass up.
2. No Clear Subject in Your Photo
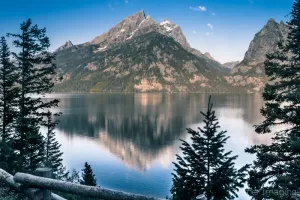
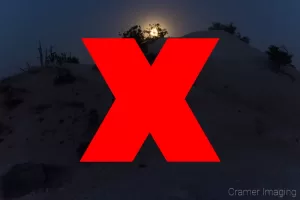
Photography is all about having a subject. It’s what pulls you into the picture and keeps your attention there. One might even call it the reason for taking the picture. So, imagine what a photo looks like and feels like without a clear subject. There’s no place for the eyes to settle on so they wander about and out of the frame. Check out this example.
I don’t know about you, but I find that my eyes won’t settle in this photo. It’s difficult to see a clear subject and rest my vision there. Let’s check out another example.

This one seems even less easy on the eyes to me. I made both of these examples extra large for a reason. This is what can happen when you don’t choose a clear subject for your landscape photo.
The Solution
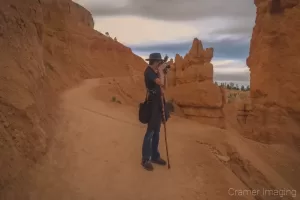
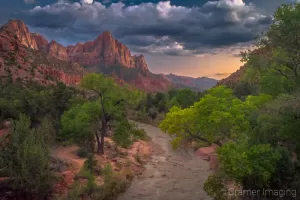
I know it can be tempting to just snap a shot of any pretty scene in front of your face. However, I’ve learned that some scenes look great to the eyes but fall apart when I try to frame them with my camera. Instead of a “spray-and-pray” method, take a couple seconds and decide upon what you want to focus on. Then compose your landscape photo around that. Doing so will create a clear subject for your viewers to rest on and enjoy. Take this example shot from the same day as the second example above.
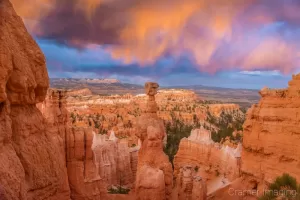
My subject is clearly the Thor’s Hammer hoodoo. You don’t miss that because I made it the subject of my photo. Your eyes naturally land and rest on that hoodoo while you take in the rest of the scene. That’s the power of a clear subject in your landscape photos.
3. Lack of Dimension in Your Photos
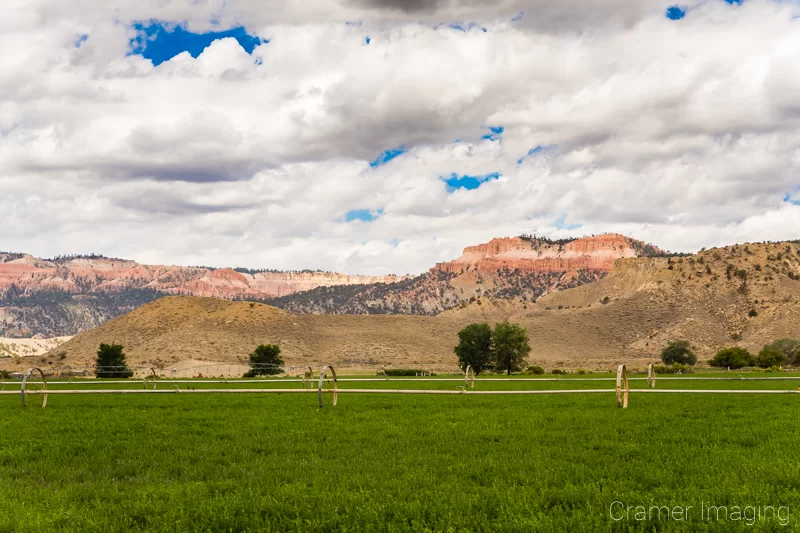
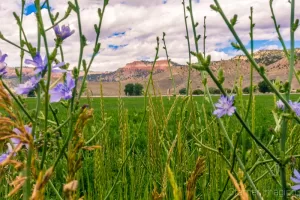
This may seem like a silly statement for something as 2-dimensional as a photograph. How do photos lack dimension? Very simply, they are very much still 2-D objects. However, we can simulate a third dimension through use of foreground, mid-ground, and background. Take a look at this graphic demonstrating where to find each in a photo.
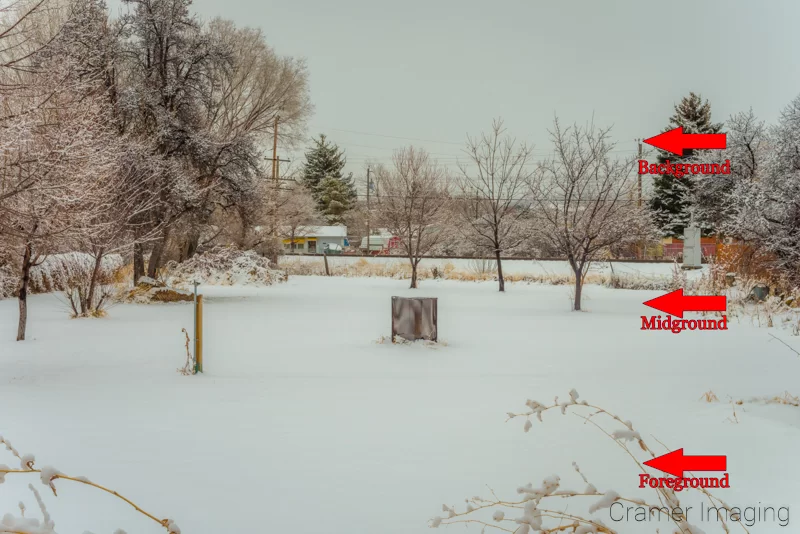
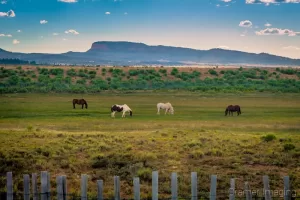
I know this isn’t the best photo in the world when it comes to landscape photography. However, it does clearly delineate foreground, mid-ground, and background in the image. There is obviously a lot in the background with houses, trees, railroad tracks, power lines, and more. If the sky wasn’t so blank with clouds, it would be part of the background too. As it is, the sky is simply negative space. The mid-ground is far less cluttered. There’s a couple trees, a burn pit, and a water spigot. Most of the rest of the mid-ground is covered in blank snow. One might say the mid-ground is full of negative space. As for the foreground, there’s a lot of negative space there as well. However, there are some snow-covered weeds popping up to add emphasis and dimension.
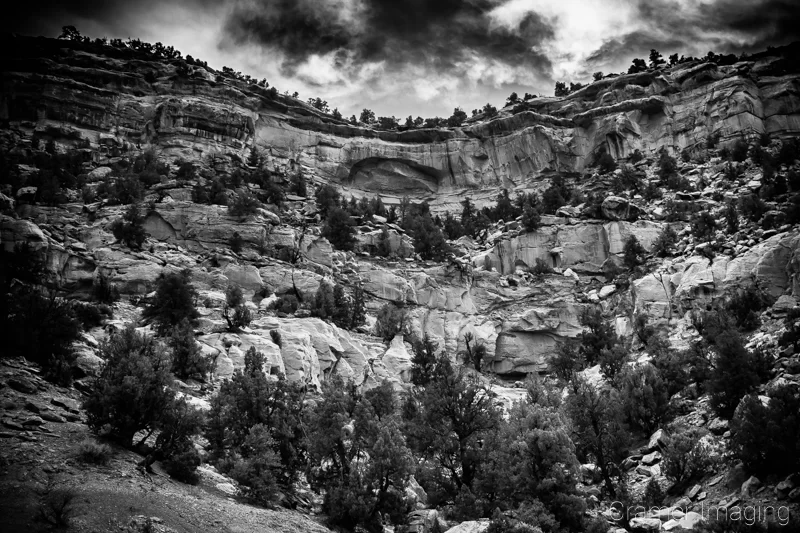
Now, with all this in mind, let’s look at an example. In this photo, I did not add that dimension into the image. Not on purpose, but there you go.
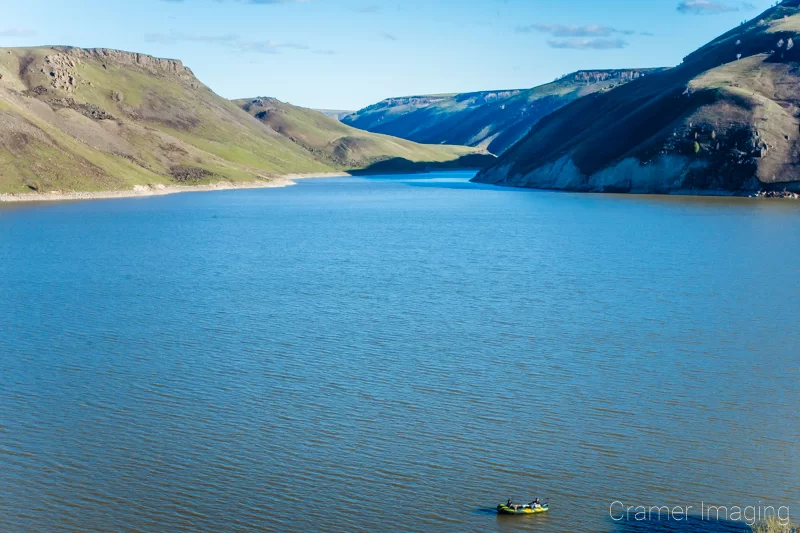
Perhaps you noticed how this landscape photo contains some very interesting formations in the background. However, there’s absolutely nothing interesting in the mid-ground unless you consider waves on water interesting. The foreground barely has interest with the raft full of people and the tiny hint of land and shadow. This is clearly a photo lacking dimension and it feels flat and even top-heavy because of that fact. If there were no waves receding off into the distance, it’d look even worse that way.
The Solution
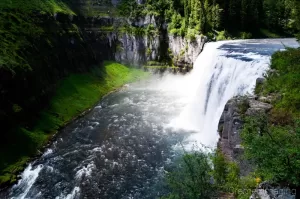
The solution to the problem of dimensionless flat photos is all about framing and point-of-view. If an image lacks weight and emphasis in any of these parts of the photo, then re-frame your shot. Stand up taller. Get on a ladder. Stoop down. You get the idea: change your perspective so that you can add the necessary depth to your photos. Perhaps you crop in post-processing. That can net you the same results if done properly. Check out how this example above went differently when I paid attention to the foreground and mid-ground in the shot.
I know that the mid-ground still looks a bit bare, but the photo improves significantly with better light and attention to the foreground. This time, I captured some of the cliff and the plants growing thereon. That added the necessary weight to the bottom of the photo and added that all important dimension the first example lacked. Check out some more examples of where I added in dimension to my landscape photos.
You really feel that 3-dimensional effect in these later examples as I took the time to add it. All of them have distinct foregrounds, mid-grounds, and backgrounds. All I needed to do was set that up in frame before I clicked the shutter button.
4. Hot Spots and Blown Out Highlights
I’ve mentioned blown out highlights before here. Now, I’ll address it head on.
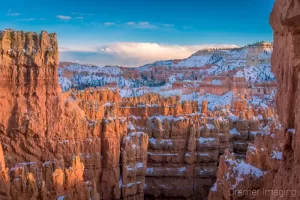
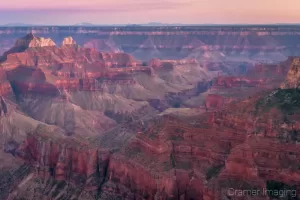
Blown out highlights are bright parts of a photo which are overexposed. In fact, they’re overexposed to the point where we lose any and all details which may be present in the scenery. The result often looks like a solid white spot in the photo where there should be some detail, contrast, color, and more. Here’s an example of what I mean. Again, I made the image extra large for viewing ease.
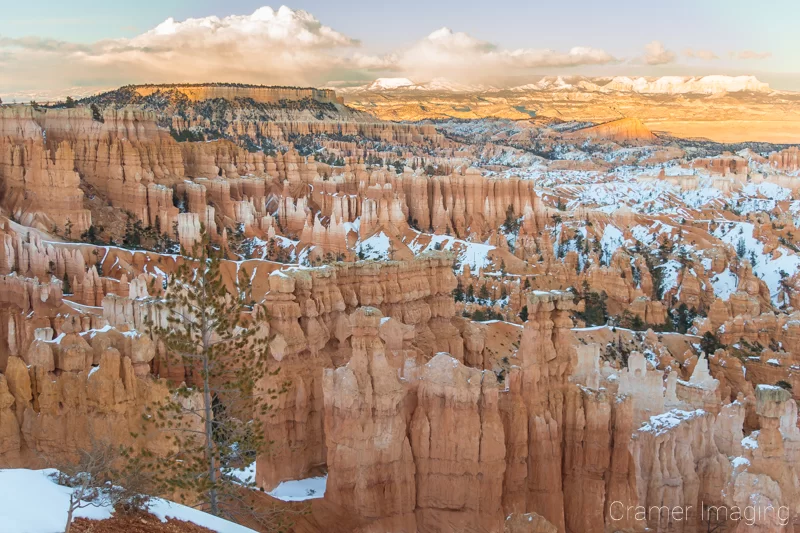
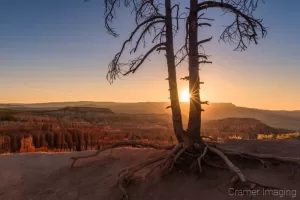
With this image you see Bryce Canyon. Part of the image is in direct sunlight: the background. The rest of the image is in the shade. The shady part has nice even lighting. However, the background does not. If you look closely at the snow on the distant peak and the clouds, you’ll see blown out highlights. There are white areas which completely lost any and all detail. They’re hot spots.
There’s simply no way to recover from blown out highlights like this. No amount of Photoshop work will bring back the details supposed to be present. Bringing down the exposure, or even the highlights themselves, will not help. Such action will only turn the white spots into some shade of gray.
The Solution
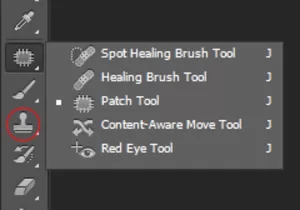
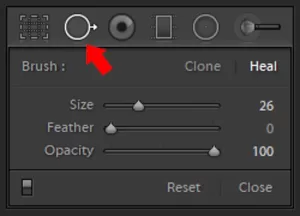
So, what do we do about hot spots and blown out highlights like this? Sadly, the answer is: not much. Sometimes you can clone stamp (or other content replacement tool) out smaller highlights. This is of course provided there’s something to work with in the image. If not, good luck.
The other option is to double check for such problems when you’re framing the scene. While you can’t do much after you’ve taken the photo, you can do a lot more before you take the photo. Check and see if you run a risk of blown out highlights. The worst offending light is that of harsh direct sunlight. Still, it only takes a fraction of a second or 2 just to run that check. If you determine that hot spots are a risk, then you might wait for better conditions. Let the sun sink lower. Return tomorrow much earlier. Try for a cloudy sky instead. Those are your options for dealing with blown out highlights in landscape photography.
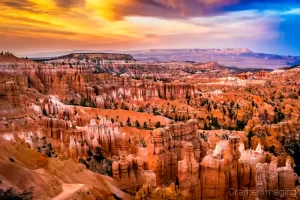
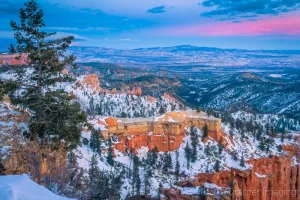
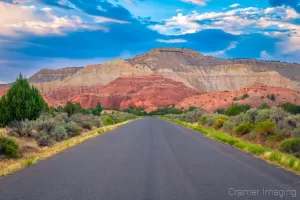
Here’s more or less that same scene on a different day. Check for those blown out highlights. You won’t find them. Even the white patches in the landscape still have details.
5. Underexpose Your Landscape Scene
One trap which is so easy to fall into is that of underexposing your landscape photo. This used to be the method of dealing with noise in the film era. Noise spots showed up more in the highlights. The counter was to slightly underexpose. However, this is something you should not do anymore in landscape photography. In fact, the problem has flipped on its head. You now encounter much more noise in the shadow portions of your photo than anywhere else. Observe this underexposed landscape scene and see for yourself.
Perhaps you noticed that the colors seem more cartoonish. Or maybe you noticed that there’s a bit of a noise problem in certain places. If not, then I’ll add a magnification of the lower left hand corner with a 2:1 magnification power. Maybe then you’ll see what I’m talking about. Also, I’m making it extra large for maximum observational power.

Please keep in mind that I’ve already applied a de-noise filter to this image. It’s still noisy and now the details are softer because of the filter. If I add more de-noise, then the overall image loses sharpness. I speak from experience.
The Solution
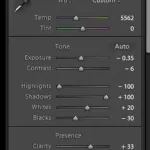
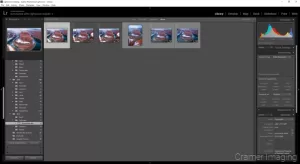
While you can’t help taking the occasionally underexposed landscape photograph for lots of reasons, you can at least control which photo(s) you choose to process. If I find that my best photo(s) are slightly underexposed (usually by less than a stop), then I can work with that and bring it back. The exposure settings in Lightroom and Photoshop can make that correction for me when properly applied.
Usually, if there’s an underexposed image in the bunch, I reject it outright. I don’t enjoy seeing that my overall best photo with the best composition and sharpness suffers from underexposure. Still, it happens from time to time. I deal with it and move on.
I leave a trail of rejected photos, such as this one, due to underexposure issues. Because I can’t fix them, there’s nothing I can do with them.
6. Arriving on Location Too Late or Leaving Too Early
Most landscape photographers out there already know that golden hour is the best time for landscape photography. If you don’t, then please check out the linked article. There are other good times such as blue hour or even the right cloudy conditions. However, knowing when those perfect windows are will not help you if you’re not on-location with your camera at the right moment. This failure of appearance might come in the form of you arriving late or deciding to pack up and leave early.
As you might expect, I’ve experienced this problem more than once as a landscape photographer. I needed to learn the hard what that this is something you do not do in landscape photography. Here are a couple of my experiences.
Arriving Too Late
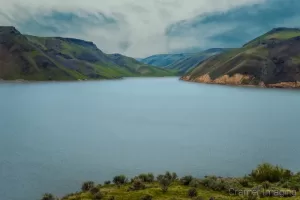
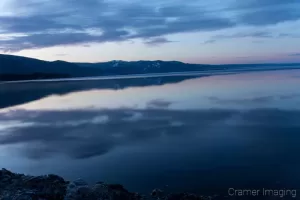
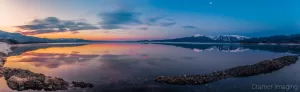
I had a commission to take photos of some local lakes which the client chose. I worked my way though the list and had one final option for the year. After this, road conditions would make things difficult. I intended to take a sunset shot of the reservoir lake. However, I did not reach it in time. This was not due to lack of location. In fact, I know almost exactly where I needed to stand. However, I started on my journey too late in the day to reach the spot before sunset passed. My best chance was blue hour landscape photography. While the shot did turn out well, it wasn’t the sunset lake scene I envisioned.

Leaving Too Early
I’ve experienced this more than once in my life. Rather than telling you of the first time this happened to me, like I’ve done so many times before, I’ll tell you of another time.
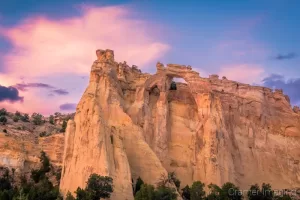
I set out to photograph the most visible and famous part of Escalante National Monument: Grosvenor Arch. So, I arrived on scene and it was partly cloudy. The clouds allowed me to take some great daytime photos of the double arch. Observe below.
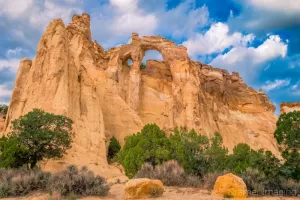
I felt satisfied with what I captured. However, having learned from previous experience to not pack up and leave early, I decided to stick around for sunset. It wasn’t that far away anyways. Things didn’t look very promising but then conditions have surprised me in the past. I knew better than to trust my eyes in this. Because I decided to stay, I had the opportunity to take more photos of the arch at sunset. Observe this example.
Then there’s this example.
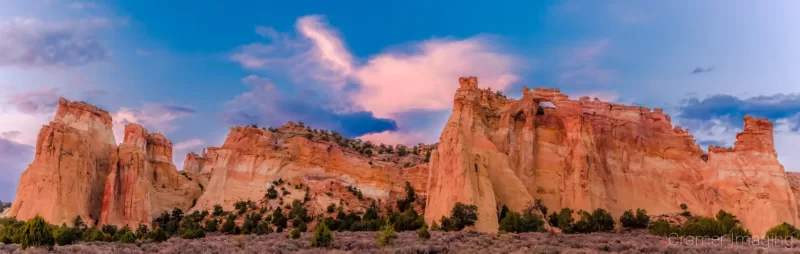
See what I would have walked away from? Because I didn’t pack up and leave early, I managed to capture these instead.
The Solution
The solution to the problem is simple: good time management and patience. Give yourself enough time to get to your location and get set up before the perfect landscape photography conditions manifest. Also, be patient and wait to make sure that you’re not missing something great by leaving early.
Set timers and alarms. Budget enough time for driving, hiking, getting dressed, getting gas, etc. If you’re like me and you struggle to get up in the morning, build wake-up time into your morning alarm. There are work-arounds to make things happen. However, the impetus is entirely upon you here. You can do it.
7. Not Checking Local Conditions on the Day-Of
 Have you ever experienced a flash flood? How about a tornado or a hurricane? How about a lightning strike or blizzard? There are all sorts of weather conditions you may encounter as a landscape photographer. Not every condition is ideal for your photography. If you don’t check the weather conditions beforehand you just might experience some of these conditions for yourself depending upon what part of the world you’re currently standing in.
On a smaller scale but more relatable note, do you know whether or not you can see the stars for astrophotography? Where will the moon or even the sun appear for eclipse photography? How about whether or not there will be enough clouds for the perfect sunset shot? Will the sunrise or sunset even be visible or will clouds obscure the view? How about rain and thunderstorms? What are the road conditions? Is is safe to drive out to your location?
Plenty an outdoor adventurer has found him or herself in trouble due to weather conditions. Landscape photographers are not unique that way either. We tend to dig even deeper into remote locations than most. If you don’t check the weather conditions, you might just find yourself in distress, stranded, or even tragically lost if you don’t know the current weather conditions for your chosen location and route.
The Solution
The solution to this problem is simple: check on the weather conditions before you head out. Check your entire route as I’ve taken a trip where the weather at the start was fine. The weather at the end was fine. However, there was a blizzard on route which made things difficult and dangerous. If I would have checked the entire route beforehand, I might have noticed the storm and postponed the trip. By the way, it was harrowing but we made it to our destination safely.

In the era of smart phones and internet, there’s simply no excuse to not check the weather. There are weather apps a plenty. Even if you find yourself in a dead zone for cell phone signal, you’re not completely out of options. Check with the visitors’ center. Ask the locals. Learn about local weather patterns for the appropriate time of year ahead of time. Pay attention to local weather alerts. Doing so may just save your life.
8. Not Learning Post-Processing Techniques
One might easily argue that much of what makes landscape photography landscape photography takes place inside the camera. While this is true to an extent, it’s only about half of the picture. The rest of the picture includes post-processing. I can tell you that you should not ignore post-processing in landscape photography.
Maybe you’ve heard of the “no-filter” movement in amateur and hobbyist photography circles. There are entire hashtags devoted to that idea. If you haven’t then I’ll quickly summarize. The “no-filter” movement revolves around the idea that a photograph is complete with only the camera. There’s no post-processing at all. No filters applied. It’s entirely raw and unedited. Now, while this does make for a good exercise in getting things right in camera, it does fall flat. Each and every one of those photos will never reach their maximum viewing potential without post-processing. Learn more about the “no-filter” movement in this article here. Check out this raw photo of mine for an example.
Perhaps you’ve learned some basic techniques. You can do some basic color correcting, spot removal, cropping, sharpening, etc. Is that enough? The answer is still a resounding ‘no.’ It is not enough. Here are a couple photos which I processed up using only basic understandings of post-processing techniques.

As you can see from both kinds of examples, the photos are good but not as good as they can be. Without proper post-processing education and techniques, your landscape photos will never reach their full potential for viewing pleasure.
The Solution
The solution to this problem is simple. Learn and use post-processing techniques. Also, make sure you have proper software to do so. Photo Soap, Snapseed, and other low-end products will not be good enough. There are both paid and free versions of acceptable post-processing software available.


Once you acquire proper software, then begins your education. You must learn how to use the software properly. With expansive software like Photoshop, do not expect to learn how to use all of it. It’s a massive tool for all sorts of different creative outlets including graphic design, photography, videography, and more. Learn how to get the most out of your chosen software for your landscape photography. Take classes, read articles, watch videos. However you choose to learn, learn and apply. When I started out, I learned a lot from both Digital Photography School and Creative Live. (Not affiliate links) Perhaps you’ll find them just as useful as I did. Now, check out what happened with those example photos once I used the proper software and proper post-processing techniques.
Perhaps you notice the dramatic different which a little of the right post-processing can do. The processed/later versions really shine by comparison. If you’re still feeling a bit reluctant, please consider this fact. The well-acknowledged father of landscape photography, Ansel Adams, used to spend hours upon hours in the dark room with his photos. What was he doing in there? Why he was post-processing his images. True, he didn’t have a computer. However, using the computer to complete the same tasks (and more) in a much shorter time frame is what I call an advantage. I didn’t become the landscape photographer I am today until I learned and mastered post-processing techniques.
9. Using the Wrong Lens
Have you ever taken a landscape photo and then found you needed to crop it a LOT? How about wishing you had a wider angle on the view? I’ve been there. Your experience might yield a result looking a bit like this example below.
This is a classic example of a landscape photo taken with the wrong lens. If you can avoid it, this is something you should not do in landscape photography. Sometimes you can fix things with a crop. Take a look at the cropped version below.
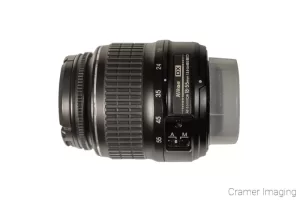
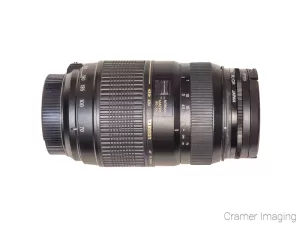
As you can see, this photo required quite a bit of cropping to try and make it work. I took it with my Nikkor 18-55mm zoomed all the way in. I should have used my Tamron 70-300mm instead with all the cropping I needed to do. It’s a bit frustrating because you know you can never go back and do a retake when you know you got it wrong somehow.
The Solution
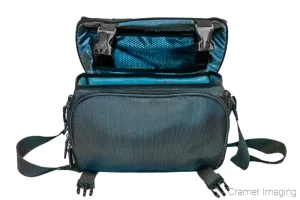
The solution to this problem is very simple. Bring a couple different lens options out into the field with you. After all, you never know what will work out the best. It’s better to be prepared. Take that wide angle lens and that telephoto lens. If you feel you need more, then bring more too. Most camera bags these days are built around the idea of transporting 2 or more lenses at once.
I acknowledge that sometimes you only have one lens. Perhaps you set yourself the creative challenge to use only one lens. Then again, perhaps you don’t have time to change out your camera lens before the scene changes or the animal moves/leaves. In those cases, do what you can with what you have. However, most landscape photos don’t require split second timing like that. This is why I discussed the rule rather than the exceptions.
10. “I’ll Photograph that Later”
Ah, the sound of procrastination. “I’ll photograph that later.” You should not say this to yourself in your landscape photography. This is because, at least most of the time, you will not get back to photograph it at all. I have a VERY long list of places I want to shoot. Several of these locations and vistas are at places I’ve already been to. I haven’t made it back yet to get the shots I want for one reason or another. The list keeps growing but I don’t often cross something off that list. Here are a couple places I wanted to shoot and made time to photograph. However, I didn’t think I would actually get to do so.
There’s so much more I want to do at both of these sites. However, I put all of that on my “I’ll photograph that later” list. I’m still not sure I’ll actually get to photograph that later or not.
The Solution
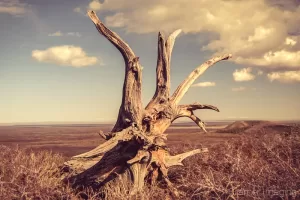
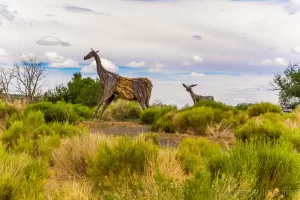
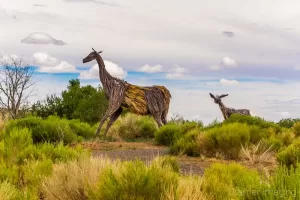
While creating this list is unavoidable in some fashion because of life, do your best to not create this list or add to it. If you want to try for a shot, don’t wait (assuming time and life permits). Get that shot while you can. Take your camera with you even if you don’t think you’ll need it. Luck favors the prepared that way. I’ve run into situations where I wished I had my camera and didn’t. Also, I took my camera on other occasions and was rewarded for doing so. Check out some of these photos I captured because I didn’t wait to shoot them later.
No, let’s compare this selection of photos which never made it onto my “I’ll photograph it later” list to one which finally just got crossed off. Here’s one which sat on my list for a good year or more and I finally revisited.
It’s not like this location was super far away. In fact, it’s only about 20 minutes away and I routinely visit the site. I just didn’t take my camera very often. So, it sat on my list as a slight regret every time we drove by. But I finally addressed it recently. Sadly, I can’t remember the last time I scratched on off of my growing list of “to-do” photos.
The moral of this story is to shoot it now. That way you don’t forget and regret.
Conclusion
So, in conclusion, there are several things which you should not do in landscape photography. You can easily avoid many of these pitfalls with a small amount of attention to each general topic each time you set up a shot. Many of them, you can easily avoid by paying attention to what’s happening with the scene in front of you. You can avoid others with some simple education, proper equipment handling, and good time management.
Photography should be fun. Reaching that final image should feel exhilarating. So, don’t let yourself be bogged down with a nasty checklist of avoidance. Take some simple notes and proceed forward with photography at your own pace. Take time to enjoy yourself too. With these tips on what to avoid in landscape photography, you’re on your way to better and more satisfying landscape photos already.
Best Sellers
Cramer Imaging Newsletter
Receive monthly updates in your inbox from us.