As a landscape photographer, I spend quite a bit of time talking about things I do in my photography. However, there is another side. There’s the side of what not to do in landscape photography. As budding new landscape photographers need this information too, I thought I’d start sharing 10 things you should not do in landscape photography.
1. Blurry Photos
I’ve seen some very well done landscape photos which feature blur. However, that’s an exception, not a rule. Instead, let’s talk about the rule of blurry photos and landscape photography.
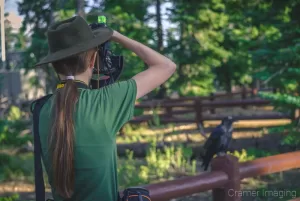
There are 2 root causes for blurry photos in landscape photography. The first is lack of stability. The second is hand shake. Both issues lead to the same problems with landscape photography: blurry and unrecognizable subject matter. Sometimes the blur is painfully obvious and sometimes it’s more subtle. You can only easily detect the subtle blur when you display your photo on a large screen where you can zoom in. Take this example which I dug out of my archives.
On the surface, it may look perfectly in focus. However it’s not. I didn’t capture this image in focus and it shows given the proper screen to view it on. The entire upper right side of the image just looks and feels fuzzy.
If you’re using a desktop computer monitor, then you might detect what I’m talking about already, even in this lower resolution format. If you’re using a laptop, then you may or may not see it. However, if you’re using a tablet or even a smart phone, then you won’t see what I’m talking about. The image is too small. So, I’ll bring in a magnified section to show you. Take a look at this magnified portion.

As you can see, I needed to reject this image. It’s simply blurry from lack of focus. It doesn’t matter if I used a tripod or hand-held my camera. If I missed the focus, I missed the focus. Deep depth of field is crucial in landscape photography. Now check out a shot from the same time where I actually nailed the focus.

With the proper size of screen for viewing, you can see that everything is in focus in this second shot. That’s exactly what you want in landscape photography. Blur in the extreme distance is acceptable because that’s what the eye sees. However, unintentional blur from lack of stability or hand shake will not yield an acceptable landscape photograph. This is definitely something you should not do in landscape photography.
The Solution
The solution to this problem is to plant your camera on a stable surface when taking photos. Oftentimes, this means using a tripod. However, there are other options such as sitting it on a rock. Some places, such as museums, may not permit you to use a tripod so you may require a monopod instead.
You can also remove hand jiggle by using a cable release or a remote trigger. Even the timer works for this purpose. Also, make sure that you’ve set and focused your camera properly before clicking the shutter. You may choose to lock the focus with the manual switch or focus using hyper-focal distance for for maximum depth of field.

Whatever combination of techniques you want to use, make sure your photos are in focus. Magnifying a preview on your camera’s screen will help you determine if you succeeded.
2. Not Getting the Horizon Line Straight
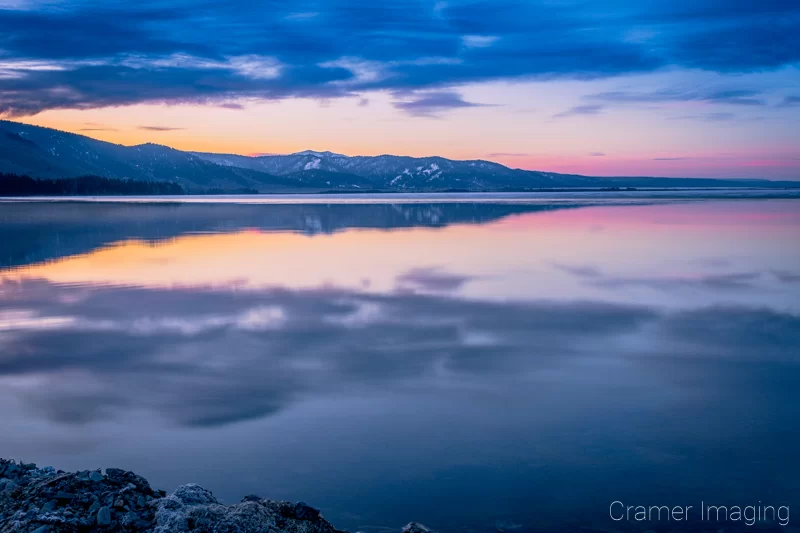
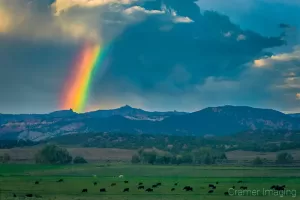
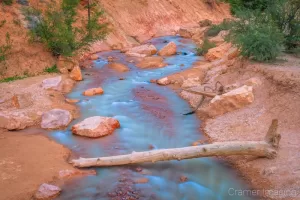
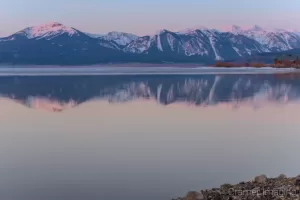
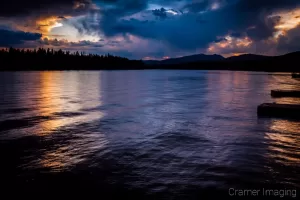
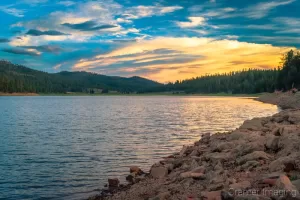
The horizon line is something we all come to understand over time. It’s always straight and flat. We know this. Now imagine what happens when you shoot a photo where the horizon line is crooked. You need not imagine as I’m showing you one below. Check this image out for an idea.
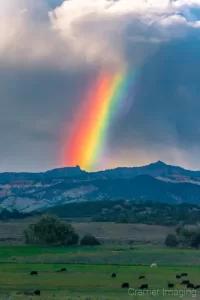
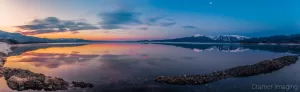
You can see that the line of the lake (and the horizon) is not straight in this raw photo. The image feels overall cockeyed and crooked. Perhaps, something might slide right on out of the frame. Even if you don’t notice the problem immediately, you know something feels wrong. This is what happens when you don’t get your horizon line straight in a landscape photo. It looks bad. This is something you should not do in a landscape photo. However, especially with hand-holding, some crooked horizons are inevitable. So what do you do with a crooked horizon? There are some solutions available. I used one to correct the problem with this image above. It became the image below.
Ok, so there are solutions available to fix this problem. What are these solutions? We’ll discuss both preventative and corrective solutions.
The Solution
There are 3 separate solutions which will help you prevent this issue in your landscape photography and 1 which will correct a problem already present. Let’s start with the prevention options.
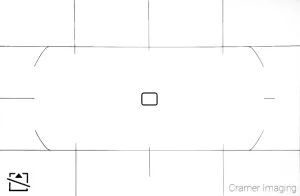
Grid Overlay
On most DSLRs (and some compact cameras), you can overlay a grid on either your viewfinder, your live view screen, or both. Align your horizon with one of these lines.
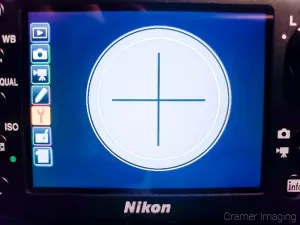
Electronic Horizon
Newer and higher-end DSLR cameras often have a built-in electronic level. When activated, it will gauge the camera’s position in space and tell you when it is evenly aligned. Depending upon your camera model, you may find it called different names such as “virtual horizon.”
Bubble Levels
Some cameras have a bubble level attached. Some tripods will have one as well. If you don’t have one built into your gear, you can easily purchase one to attach onto the camera’s hot shoe. Just like a spirit level in the construction business, these levels will help you straighten your camera out and create that proper flat horizon line.

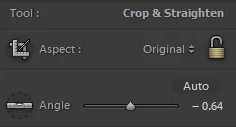
Post-Processing
If all else fails in the field, every major photo editing software offers a “straighten” tool which allows you to draw a line tracing the horizon. Using this tool, the program will automatically rotate and crop the image on an angle to make sure that the line is perfectly horizontal.
3. Only Shooting in Landscape Orientation
Landscape scenes, by definition, are often wide and vast views. They naturally favor landscape orientation when choosing how to frame a shot. However, portrait orientation is also just as valid in landscape photography. Check out this example of the same landscape scene shot in both landscape and portrait orientation.
It’s all about how you choose to frame the scene in front of you. Choose what to include and what to exclude. You might discover that portrait orientation might suit your needs better than landscape orientation would. Some of my favorite landscape photos from my portfolio were shot in portrait orientation. Check out a sampling below.

The Solution
This is actually a quick and easy solution. If you decide to frame a scene, take some time and look at it from both angles. Reorient your camera into portrait orientation and see how the scene looks. Sometimes a scene will look much better in portrait format.
Sometimes a scene will work out well for both landscape and portrait orientation. In that case, take photos in both orientations. You never know if one will work out better than the other or both will turn out equally well.
4. Forgetting About the Aperture
 When you get into the moment of capturing a photo, it’s easy to forget about all the in-camera tools at your disposal. The camera aperture is top on that list. This camera function allows you to control the depth of field. This is important in landscape photography which often requires a deep depth of field. However, many beginner and amateur photographers often shoot but forget about this function. I’m occasionally guilty of this myself. It’s so easy to just set the aperture at a single setting and run with it almost everywhere. However, this would under-utilize your camera.
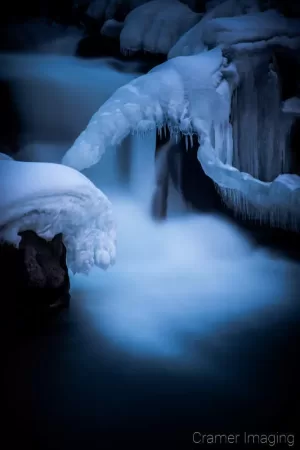
While you should shoot at the lens’ sweet spot (often in the f/8 to f/11 range) as a general rule, there are times to deviate from that rule. Here are a couple of examples requiring a much wider aperture.
You may easily find other examples. However, ignoring the aperture is something you should not do in landscape photography. You might just cost yourself the kind of photo you sought to capture.
The Solution
Most of the time, at least with daylight landscape scenes, you won’t need to worry so much about aperture. Set your camera with a mid-level setting in that sweet spot and you’ll do great. However, if you’re pursuing a new space in landscape photography, take some time and research out typical usable camera settings including aperture settings. Your research may save you some headache and endless experimentation.
5. Only Shooting Using the Camera’s “Landscape Mode”
Many point-and-shoot cameras, and even smart phone cameras, offer several different “modes” designed to make it easy to take the photo you want. These “modes” will automatically choose your aperture, shutter, and ISO for you. They may even choose other camera settings, such as pop-up flash use, for you. You may see a symbol like this on your camera’s mode dial or in the digital settings to represent the “landscape mode.”
These camera “modes” take much of the guesswork and learning curve out of using a camera and remove barriers from you taking the kind of photo you want both quickly and easily. However, these camera “modes” are built for some very specific circumstances. Use a camera “mode” way outside of its set perimeters and it will fail rather spectacularly at capturing the scene.

The Solution
If you truly want to capture a wide range of landscape photos, including night and astro shots, then you need to learn some camera basics. “Landscape and night mode” will always hold you back. Start by learning about aperture, shutter speed, and ISO. Then learn how those camera functions integrate with the camera modes of PASM. Read your camera manual to learn how to use those modes on YOUR camera. If your camera doesn’t offer direct control like this, then you may need to upgrade your camera to something which does offer such control.
I know that this requires time, research, and effort. However, if you want to do anything decently well in life, then you must take that time and make that effort. Research will allow you to skip past initial experimentation and discovery into knowledge faster. Still, controlling the basic camera operations of aperture, shutter, and ISO is far less scary than it sounds initially. With some research, guidance, and practice, you should master the basics of camera operations quickly and easily. Then you can better control the camera and take those landscape photos you dream of.
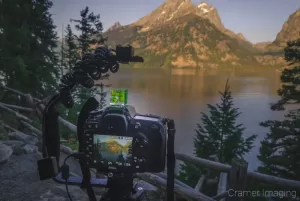
6. Stand Next to Other Photographers for Your Shot
If you’re relatively new as a landscape photographer, then you might feel the strong temptation to use other photographers as inspiration. After all, they’ve got their cameras out at the ready. They must be on to something, right? Then your fear of missing out (FOMO) kicks in and you plant your tripod right next to them and set up for the exact same shot.
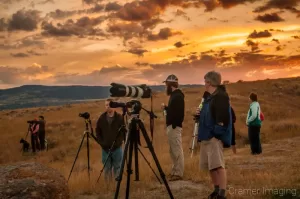
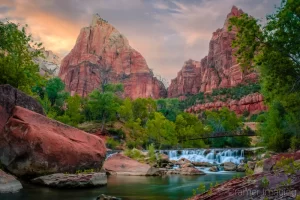
I’ve run into other photographers out in the field with their cameras. I’ve even decided to join them because I felt they must be on to something. Later, I’ve even come home with some beautiful photos which I still display in my portfolio to this day, like these below.
Each and every one of these photos above was an instance where I noticed other photographers taking a shot and I decided to try my own hand at the scene. I’ll admit: sometimes other photographers are there for a reason, and a good one at that. Still, if you follow the crowd, then you’ll never find anything new and interesting. Many times, it’s better to be a trail-blazer in landscape photography. This you cannot do if you only join and follow the crowd. Here are some examples of what I found when I struck out on my own as a landscape photographer.

I was all by myself as a landscape photographer in these instances. While these photos may be a bit derivative, I challenge you to find another landscape photographer’s take on the same places. This is the virtue of striking out on your own as a landscape photographer. While I won’t say that joining other photographers is something you should never do in landscape photography, I will say it’s something you should avoid doing much of the time.
The Solution
I will give you that most of the big and dramatic landscape photography locations are already well documented in film. Still, there are still plenty of under-appreciated gems which you can find. Some spots might even be local to you. Try talking to locals on trips to see what’s there. Go hiking on trails which you haven’t explored yet. Do online research to find options.
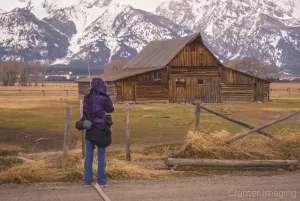
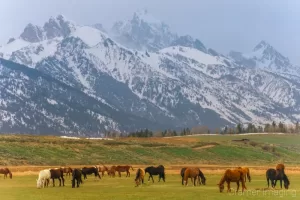
When you do decide to set up shop next to other photographers, especially at popular locations, use it as an opportunity to demonstrate your competence in landscape photography. Most people already know what Old Faithful, the Delicate Arch, the barn in Grand Teton National Park, and other very famous locations look like. Photographers shoot them from many angles. Show your skills as a photographer by taking a traditional shot and then looking for a different or less common angle or take on the same scene.
7. Including Too Much Unnecessary Negative Space
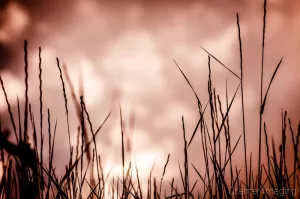
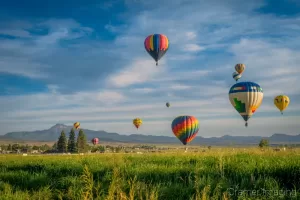
Perhaps, though your studies of art and photography, you’ve encountered the concept of negative space. For those who have not, negative space is the concept of giving something breathing room. It’s empty space which you do not fill with elements of the image. You find it surrounding and filling gaps between subject matter. It might consist of a solid color or it might simply exist in black/white. Negative space is one of those things which is much better demonstrated than explained. Take a look at this example.
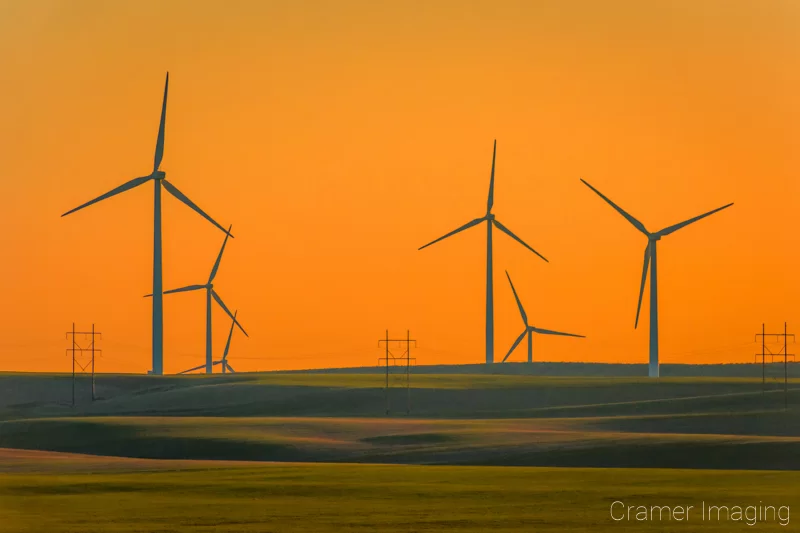
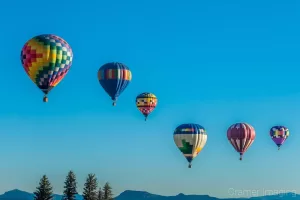
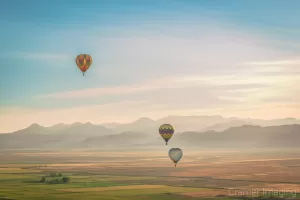
Observe all the empty orange sky surrounding the wind turbines. That’s negative space. Now, let’s take a look at an example which includes way too much negative space and observe the effects on the overall image.
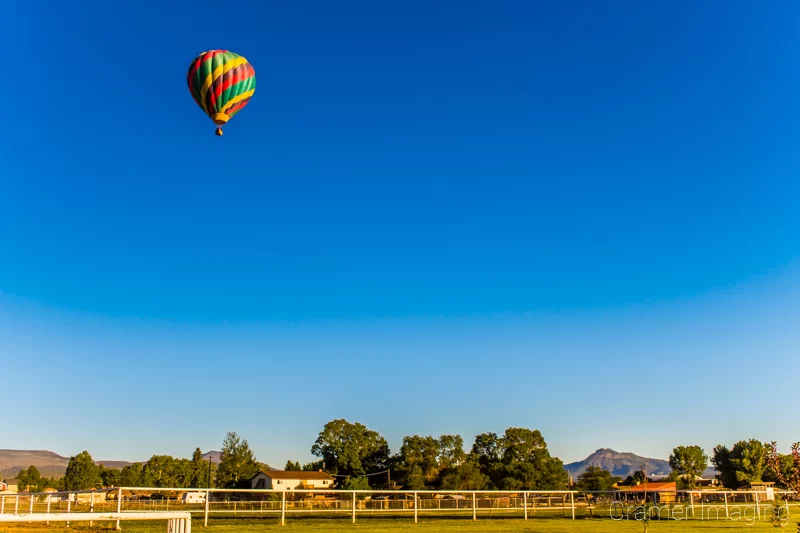
As you can see, with negative space: there is breathing room (as demonstrated in the first photo) and then there’s too much negative space (as demonstrated in the second photo). You might observe that the elements of the landscape below and the hot air balloon above feel disconnected from each other thanks to how much negative space it in the photo. This surplus of negative space is something you should not do in landscape photography. The elements of the photo must feel connected in some way.
The Solution
For landscape photography, which is considered an immovable subject, you should have plenty of time to frame your shot. This means that you can account for excessive negative space and adjust accordingly. If you happen to include something like a hot air balloon or a wild animal, then you might not have as much time to decide and frame. So, you must do your best in the field.
Your ultimate opportunity to deal with unnecessary negative space comes during culling and post-processing. There, you can eliminate those unsalvageable photos from consideration. No one need see them at all. With the salvageable ones, you may crop and otherwise alter them to suit your purposes and also eliminate the excess negative space.
8. Using a Single Perspective Only
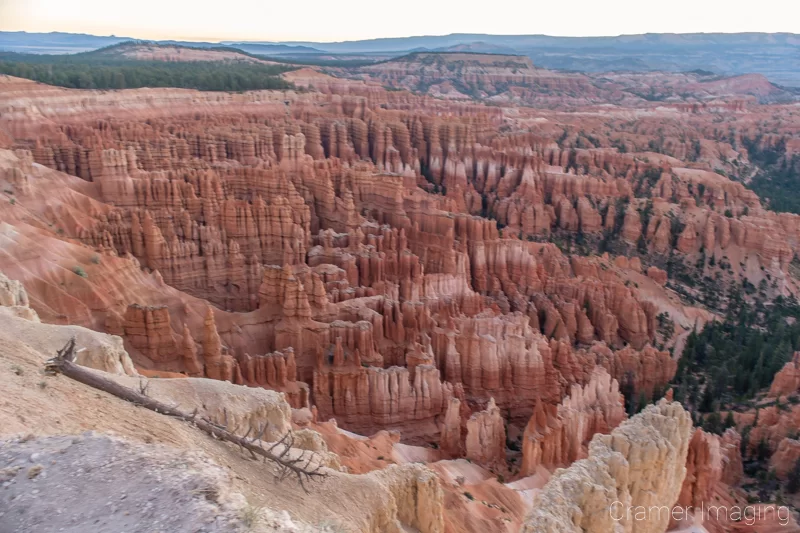
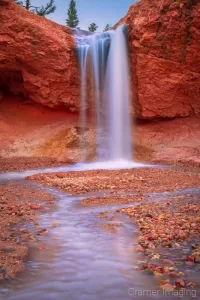
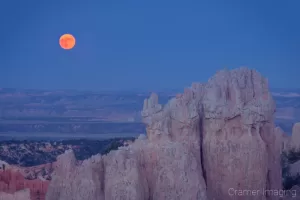
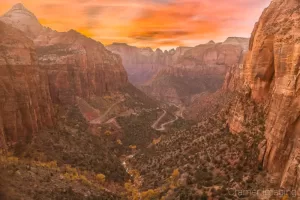
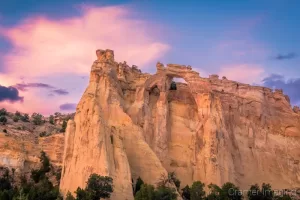
Most people, when they pick up a camera, will default to shooting at eye-level. It’s how we see things normally so it makes sense. However, this is something you should not do in landscape photography. At least, you shouldn’t ONLY do. Sometimes eye-level or a single camera angle perspective is fine. However, many of the great landscape photos out there are not shot from a single perspective like that. Many times, there’s more than one angle which you can use to shoot from. Let’s look at this example of the famous Thor’s Hammer hoodoo from Bryce Canyon.

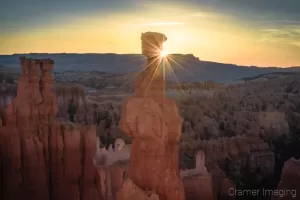
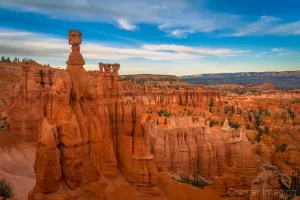
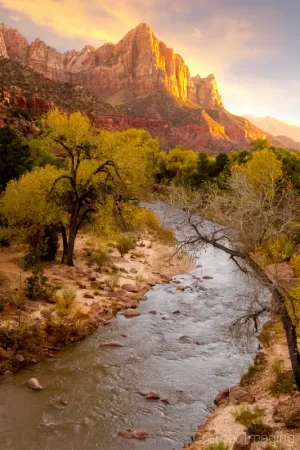
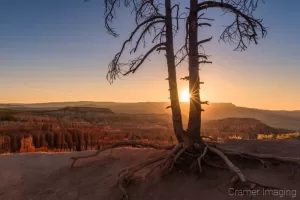
Each of these angles on the hoodoo comes from a different angle of perspective. The angle chosen changes how you see this rock formation against the surrounding canyon. This same principle applies to all of landscape photography. Observe these landscape photos of mine which I took at different camera angles than simply eye-level.


While I may have stood to take one or more of these photos, I deliberately sought out a different angle to shoot from. Perhaps I stood on a cliff or a bridge. I might have stooped down close to the ground to change things up. The point is that I sought out a different angle to shoot the subject matter from. My photos look that much more spectacular for my efforts.
The Solution
When you’re out on a landscape photo shoot, take some time to absorb the scene. Sure, try standing at eye-level and getting a few shots in. Get it out of your system. Then take some time and change your angle. The easiest option is to stoop and shoot closer to the ground. However, it’s not the only option. Try climbing up a ladder, a tree, or on your car if you can. If you can afford to do so, acquire a drone and really go for the difficult-to-reach angles all over the place. Oftentimes, your efforts here will yield much better landscape photos.

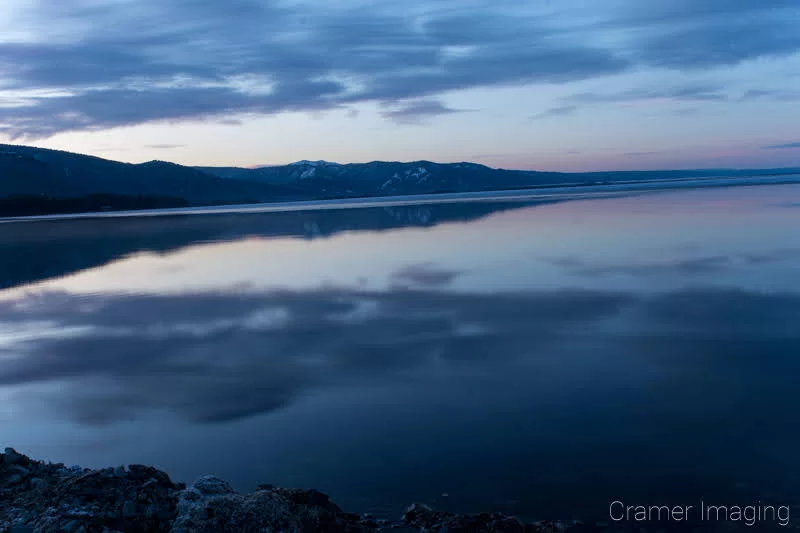
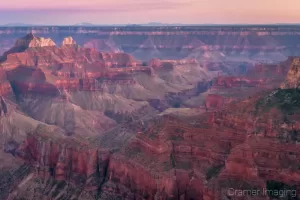
9. Shooting with Empty Skies
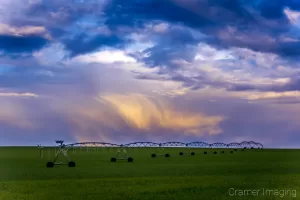
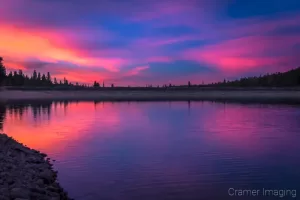
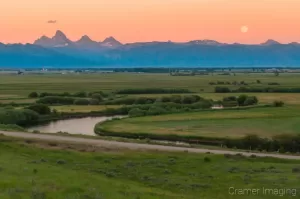
It’s a natural problem every landscape photographer will eventually face: empty skies on a photo shoot. What do you do? Do you take the shot or do you try for another day? Many newer photographers will take the shot anyways. This can result in a problem with your photos as many landscape photos rely upon drama in the skies as an element of composition. Check out these examples of mine which do not include clouds in the skies.
I do shoot with empty skies occasionally and I do come back with great photos sometimes. However, please take note on how I handle those empty skies. Either I treat them as necessary negative space or I work to minimize their presence in my photos. This becomes much more marked when I’m shooting hot air balloons as they don’t always deem conditions safe to fly in when there’s drama in the skies. Check these out for examples.
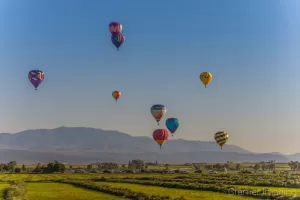
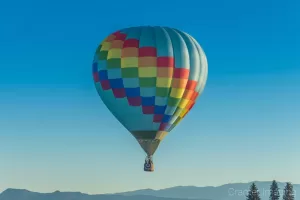
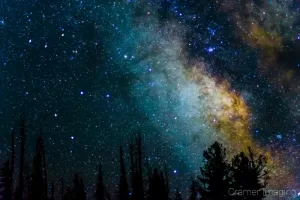
I do what I can with my photos. Still, there’s simply no escaping those very empty blue skies. Now, let’s check out some examples of landscape and hot air balloon photos where I had clouds and drama in the skies for comparison. I’ll just group them all together for simplicity’s sake.

I assume you can see the differences between the first examples and this group above. The difference is the clouds and the drama in the skies.
The Solution
There are a couple solutions for this particular issue in landscape photography. The first is simply to not shoot during times and on days where you don’t have clouds. You can easily check the cloud cover for your local area with satellite views or simply by stepping outside to look. If you don’t shoot on extra clear days, then you won’t deal with empty skies.
Another solution is one I touched on above. Do your best with the situation. Perhaps you minimize the sky in your composition. Or, you might treat it like negative space. Work with the scene in front of you while also understanding that it still might not work out in the end.
A final but more advanced option, only available for some photos, is a sky replacement. Sky replacements are more advanced Photoshopping techniques which a beginner might find intimidating. They involve placing a separate sky photo as a layer over the top of the blank sky you wish to replace and then mapping the layers appropriately so the replacement sky covers only the area you want it to. You also take some time to color match as best as possible. This technique won’t work for some kinds of photos such as those with lots of trees to work around. Still, sky replacements, when properly done, will also alleviate the empty sky problem in your landscape photography.
10. Cluttered Backgrounds
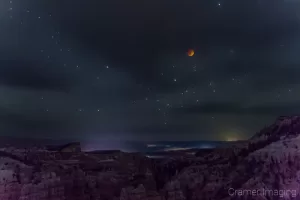
Since we’ve already discussed those boring empty skies, let’s talk about the other end of the spectrum: cluttered backgrounds. Landscape photography, just like other forms of art, is a balancing act. You need the right balance between subject matter and background. If you are off in one direction or the other, the photo looks wrong. You might not know where to point your finger, but you know something is wrong. Let me show you one of my photos which suffered from this cluttered background problem.
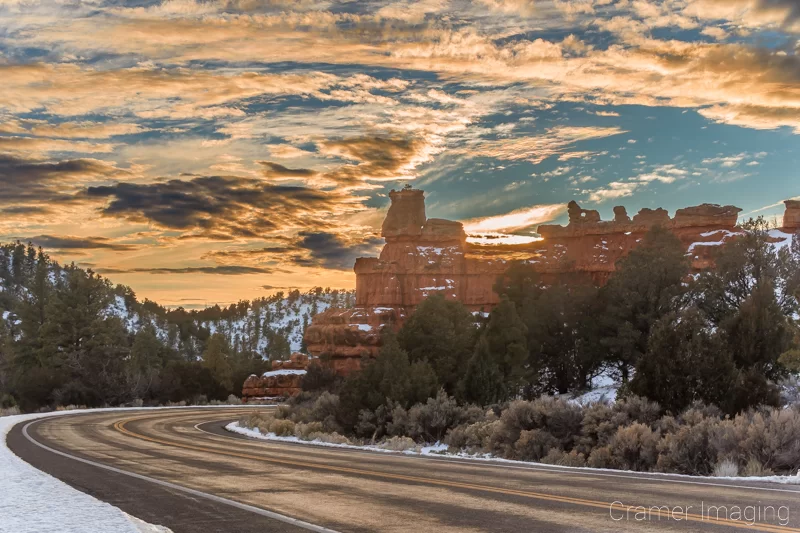
Perhaps you feel it as well with this particular image. I tried for hours to make it work. I even sought out advice from others (including other photographers) on how to make it work. The simple answer was that I couldn’t based upon how busy and even cluttered the sky was in the shot. Since that’s exactly what the sky was that day (no sky replacement here), there really wasn’t much I could do about it. I did crop some already. However, any more cropping would have destroyed how other elements worked together, so that option was out.
Normally, I would recommend that you remove distracting and superfluous elements from your overall composition. However, we’re talking about landscape photography here. We can’t easily remove clouds like this, even with Photoshop. So, what do we do?
The Solution
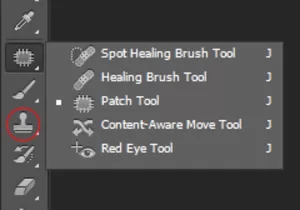
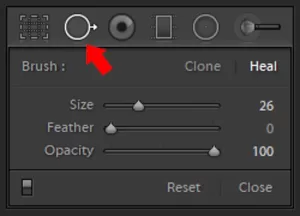
The solution here is two-fold. If you can remove the distractions at all (either onsite or in post), then do so. Clutter and distractions are much easier to deal with onsite if possible. Then you need not worry about post-processing there. Re-framing is often the best option. However, there are situations (like the clouds above) where you cannot re-frame or remove the clutter onsite. For those instances, you must rely upon post-processing. If you can remove extra distractions and clutter using the clone stamp tool, the healing brush, or other spot removal tools, then do so. You may just salvage your photo in the process. These tools were invented with such purposes in mind.
On the other hand, if you cannot deal with the background clutter in your landscape photo (like my example above), then you must cull the photo. There’s simply no better answer for it. Stop working on it and go on to another which will work out better for you.
Conclusion
So, in conclusion, there are several things which you should not do in landscape photography. You can easily avoid many of these pitfalls with a small amount of attention to each general topic each time you set up a shot. Many of them, you can easily avoid by paying attention to what’s happening inside the frame along with what’s happening with your equipment. You can avoid others with some simple experimentation with camera settings, camera orientation, and even your position as the photographer.
Photography should be fun. Reaching that final image should feel exhilarating. So, don’t let yourself be bogged down with a nasty checklist of avoidance. Take some simple notes and proceed forward with photography at your own pace. Take time to enjoy yourself too. With these tips on what to avoid in landscape photography, you’re on your way to better and more satisfying landscape photos already.

Best Sellers

Cramer Imaging Newsletter
Receive monthly updates in your inbox from us.