
I’ve been a landscape photographer for a few years now. This means I’ve taken time to go out in all sorts of conditions for a landscape photo. Over those years, I’ve made an interesting observation (at least to me). That’s what I want to discuss today: the other side of landscape photography. The side they often don’t tell you about. So, let’s dive in.

The Front-Facing Side of Landscape Photography
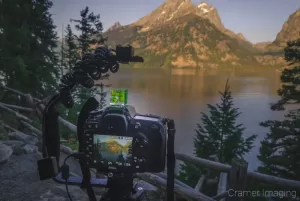
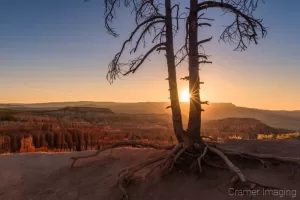
Landscape photography is all about capturing that perfect scene right in front of you. For that task, you need camera equipment. Depending upon what you want to shoot and how far away it is/how fast it moves, you might need some specialty stuff. You’ll find all kinds of reviews and tutorials out there for what kind of lenses and camera bodies you will need for certain kinds of photos. Also, you’ll find accessories a plenty (such as filters, tripods, memory cards, etc.) to assist you in achieving that perfect shot.
Once you reach a certain point, you’ll also start thinking about how to transport you and your camera gear to those locations. Then you’ll look at camera bags, harnesses, suitcases, and more. These are all common items on a landscape photographer’s shopping list. If you don’t shop for them immediately, you’ll find them popping up on your list eventually. That is if you pursue landscape photography as a serious hobby or even professionally.
The Other Side of Landscape Photography
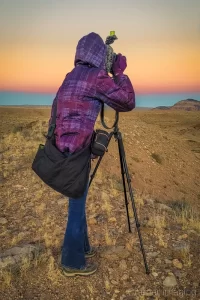
As time passed and I took more landscape photography shoots, I began to realize there was more to landscape photography than simply the camera and pretty scenery part. In fact, there is a whole other side to landscape photography which I somehow missed. Perhaps you’ve already seen, guessed, or experienced it for yourself. It is the fact that a landscape photographer is also an outdoorsman.
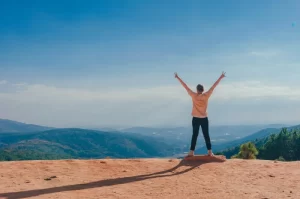
If you think about it, many of the best landscape photography shots you can think of are not scenes which you can drive to, hop out of your car, and walk a few feet to. Sure. There are plenty of those kinds of sites too. However, the most worthwhile ones are remote. They often require hiking to reach. This is where the outdoorsmanship part comes in. You need outdoorsmanship skills and equipment to make the more remote hikes work. You also need the creature comforts to do more than barely survive the trip.
Now, let’s stop and think about this point for a second. Part of the other side of landscape photography is the creature comforts of transporting you and your camera out to the right spot at the right time. It does you absolutely no good to arrive at the right spot at the right time and find yourself too tired or sore to capture the shot you wanted. If you’re frozen or heat exhausted, you run into the same problem. Do you see the point? Creature comforts are a massive part of landscape photography. They get you to the spot so your camera can do the rest.
What Kinds of Creature Comforts am I Looking at?
Now, you may ask what kinds of creature comforts should you look at? The answer is that it depends highly upon what you plan on doing. There are different creature comforts for weather conditions, seasons, terrains, etc. Still, let’s look at some basics. These are in no particular order.
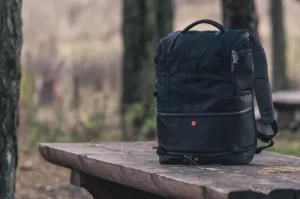
1. Backpack
If you’re toting a camera backpack, then you already have a specialized backpack. However, not everyone needs to carry an arsenal of camera gear into a remote location. For those who opt for lighter camera gear, you may choose a regular hiking style backpack instead. Either option works overall. Find what works better for you and your needs. Make sure that whatever backpack you choose fits your frame well and helps balance out the load properly.
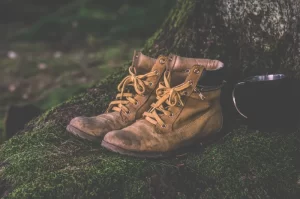
2. Footwear
If you’re hiking you need good footwear. Period. There’s no debate on that subject. You need something which will enable you to comfortably walk the miles into your site. You don’t need blisters on your feet. That’s where good footwear comes in. Your hiking conditions may vary from sand to stone to wet river or stream-beds to snow. Be sure that you choose the right footwear for your needs. Will you need ankle support? Search for high-top boots. Also, think about whether or not you care about your feet getting cold or wet. Water shoes (a kind of hiking shoe available) are specifically for those hiking who don’t mind wet feet but want their shoes to dry quickly and not blister their feet. See what I mean? Do your research. Make sure to try them on first. Then break them in before using them on a long hike.
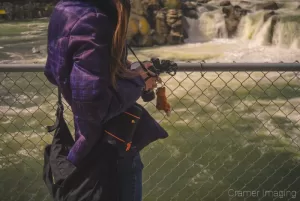
3. Clothing
When out on a hike, you want base layer clothing which won’t weigh you down. Also, you want it to hold up to the rigors of the hike. It wouldn’t do for your pants to end up destroyed because too many tree limbs reached out and snagged or you scraped them on a rock. So, you need durable clothing. Also, you don’t want your clothes to keep sweat right up against your skin. That’s very uncomfortable and could cause hypothermia in winter conditions. So, you also require clothing with wicking abilities. Choose your clothing options carefully and appropriately for the conditions you might expect to endure on the hike.
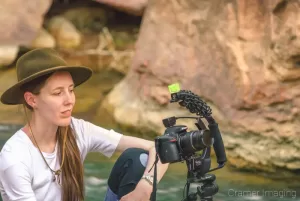
4. Sun Protection
When out hiking, even under cloudy skies, you should consider sun protection. Longer sleeves/pant legs, sunglasses, sunscreen, and/or a hat will often work for this purpose. There are even specific outdoor clothing lines designed with sun protection in mind. No matter what you choose, keep in mind that sunburns and blistering sunburns will make your hike (or recovery afterwards) extra miserable. Choose wisely.

5. Wind and Weather Protection
You may think that this section falls under clothing, sun protection, or even shelter, but it doesn’t. Base layer clothing is applicable no matter what conditions you hike in. However, the extra layers of wind and weather protection aren’t base layers. They also aren’t shelter. However, they do protect you from inclement elements which would make your hike miserable. They really are simple. If you might expect rain, pack a rain coat. If you might expect snow, take winter gear like gloves, a scarf, and a winter jacket. Make sure that this gear is light enough to not weigh you down either.
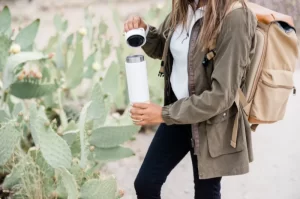
6. Hydration
Hydration is important no matter what hike you take. The longer the hike, the more hydration you require. This means the more you must carry with you. Short hikes of a mile or less might only necessitate a 16oz bottle of water. Hikes of several miles will require much more water. A large water bottle might not be enough. This is why hydration backpacks became popular. If you elect to use a hydration backpack, then you cover 2 points here with one piece of equipment. Bonus. But you won’t need a hydration backpack for every situation nor will hydration backpacks work for everyone. So choose your method of water carry appropriately.
6. Snacks
Hiking and carrying weight is an energy-intensive job. You will need something to replenish your energy. That’s where snacks and trail food comes in. While you can be a bit less picky on your trail food selections for shorter hikes, you need to choose something sustaining for longer hikes. It’s only with sustaining snacks that you can hope to reach your destination and back with strength enough to photograph the destination and return to your car. This is why things like beef jerky and trail mix exist.

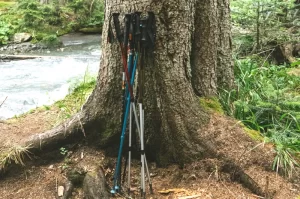
7. Hiking Sticks and Trekking Poles
Many hikes require some instances of precise navigation on or around boulders, over cracks and fissures, around tree roots, up or down steep slopes, or through flowing water. When you run into those kinds of situations, a walking stick or a set of trekking poles come in handy. They will assist you in making the crossing. The stability they provide on unstable terrain is invaluable, especially the ones with built-in ice spikes for winter hiking. You can also use them to aid you in standing up when tired. They may come in handy in other ways. For instance, I’ve seen tripods and monopod heads which adapt your trekking poles into the design. This lowers your overall weight in your backpack. (Sorry, I don’t currently have any to recommend) Choose your stick(s) wisely. Make sure that it/they can and will support your weight, especially if you carry more than average on your frame.
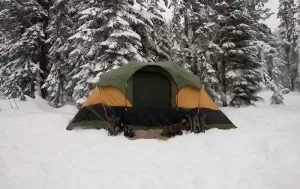
8. Shelter
When taking long distance hikes (overnight or multi-day) you will inevitably require some sort of shelter. Your best bet is a tent or bivouac structure. But shelter also includes some form of sleeping bag or other sleeping accommodations. These creature comforts will help keep the elements at bay along with the creepy crawlies while you sleep. Larger animals will more likely avoid your encampment too. As with other points on this list, size and weight are issues, especially with the duration of a long distance hike. Oftentimes, it’s better to choose something which will barely meet your comfort needs in camp and will meet your weight requirements on your back. Thus you don’t tire yourself out too early.
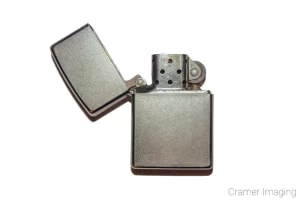
9. Fire Starting Tools
This creature comfort tags along with the shelter. However, it is subject to local regulations. If you need to set up a shelter for the night on a hike, then you probably need to cook and keep warm. That’s where the fire comes in. The cooking and cleaning is a creature comfort. The keeping warm part is life-saving. So, how do you build a fire out in the wilderness? You take some sort of fire starter. It could be matches, steel wool and 9V battery, modern flint and steel, a well stocked lighter, or more. You get the idea. You never want to find yourself in a situation where you can’t make fire to save your life. If you choose the right system, it can easily fit in your pocket or even dangle from a cord as a pendent on a necklace. So, choose well for your fire-building skill and your needs. Find space in that backpack for this life-saving backup plan, even if you don’t need to use it.
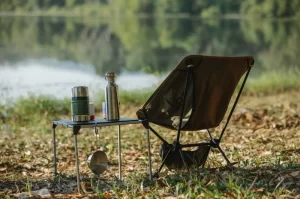
10. Chair
This particular creature comfort recently came up for me. I recognized that there are times out hiking when you need to sit down and there’s not a handy rock or tree stump. The ground is not always the best option either. That’s where a chair comes in as a creature comfort. There are camping and backpacking chairs which will meet this need. However, the camping chairs are significantly heavier than the backpacking chairs are. For those longer hikes, you might need to shave off those pounds or kilograms. This is why engineers designed backpacking chairs to be so light. Still, imagine how good it feels to sit in a proper chair with a back when you need to take a load off your feet. Chairs really are part of the creature comforts to consider.
Conclusion
So, in conclusion, you probably noticed that there are several creature comforts to consider as a landscape photographer. This is part of that “other side” of landscape photography I mentioned. The other side of landscape photography is outdoorsman skills and creature comforts. Each point listed here involves just such skills and comforts. Since this is far from an exhaustive list, there’s probably more I didn’t list here.
Now it’s your turn. What do you think about the “other side” of landscape photography? Was it what you expected? Do you have other points to add on? Please leave your thoughts in the comments section below.


Best Sellers
Cramer Imaging Newsletter

Receive monthly updates in your inbox from us.